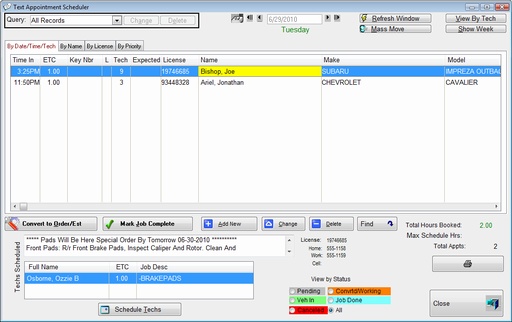
Appointment Scheduler Window
The Appointment Scheduler is an independent executable file that can be run along side
of any of the Garage Partner Programs. It allows you to enter and view an
unlimited number of Appointments. Views can be sorted easily by clicking
on the Tabs. Appointments for each day can be accessed by the Calendar,
or by clicking on the left and right arrows on either side of the date.
Note: You can Highlight names on the list by right Clicking and selecting Add/Remove Accent.
If you put the reason WHY it is highlighted at the top of the notes, other will be able
to identify the reason.
Convert to Work Order - Converts this Appointment to a Current Work Order automatically
Mark Job Complete - Marks Job Complete
Find - Allows searching for appointments
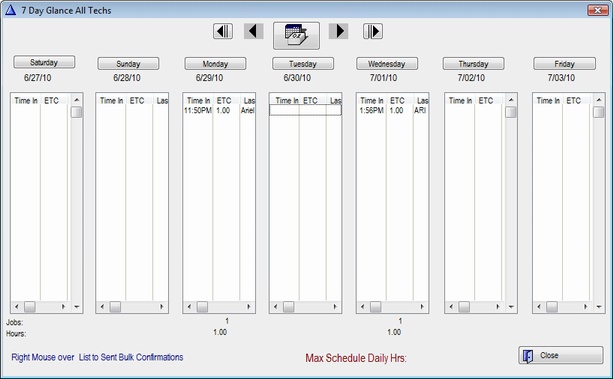
An overall view of the entire week can be shown by clicking the Show Week Button.
Show Week Window will show the number of jobs and hours for each day.
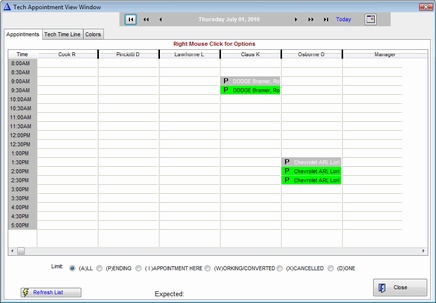
View By Tech: Shows Weekly Scheduler BY TECH
Update Scheduler Window
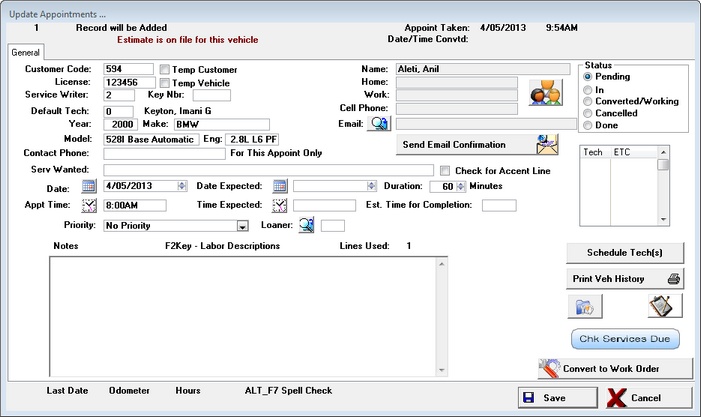
Temp Customer/Vehicle - Use these Check Boxes to schedule appointments for
Customers not in Data Base.
Duration - Estimated Time for Repairs
NOTES - Free Form Notes Entry, Use F2 Key to lookup canned Descriptions
Schedule Techs - Assign more techs to this job.
Loaner - Click the Lookup box ![]() and schedule the Loaner Vehicle.
and schedule the Loaner Vehicle.
Convert to Work Order - Converts this Appointment to a Current Work Order automatically.
View Needs Button![]() - View any previous needs or Notes that were noted when this vehicle was serviced last
- View any previous needs or Notes that were noted when this vehicle was serviced last
Browse Service Group Button ![]() Shows previous work done by Service Group.
Shows previous work done by Service Group.
Services Are Due: Blinks if services are due
Send Email Confirmation Button - Sends Email Appointment Confirmation to Customer's
Email on File.
Name-Home-Work-Cell Phone-Email: Are all Read Only Fields, unless Temp Customer is Checked.
Home-Work-Cell Phone can be changed for existing Customers by pressing F2Key or Right Mouse.
EMail is also a read only field and can be changed by Clicking the Email Button to the left of the email field.