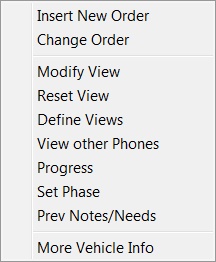
To create a new work order click the  button on the Current Work Order Window, or Right button on the Current Work Order Window, or Right
Mouse Click for a menu of options - See Video
. 
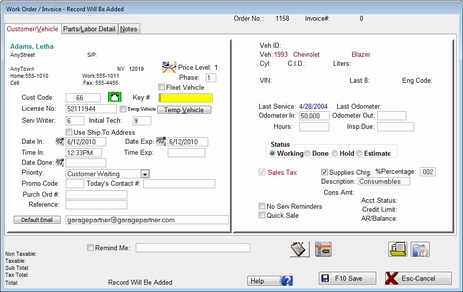
This will pop up the Add Order Window and Automatically pop up a customer List
If the window is set NOT to popup, you can Press the F2 Key to pop up a list of your
customers on file. You set this pop up to be automatic in Global Configuration.
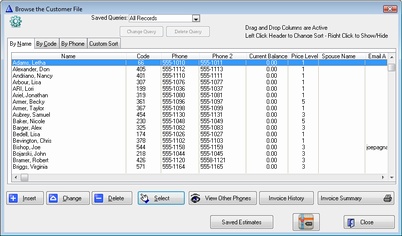
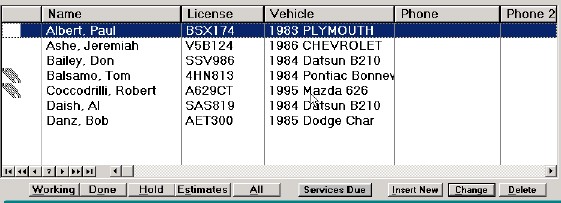
Select the Customer from the list, or Click the Insert Button to add a new customer.
Next, either enter the License Tag for the customer's vehicle, or Press the F2 Key
again for a list of vehicles on file for this customer. The Vehicle pop up can be set
to be automatic in Global Configuration.
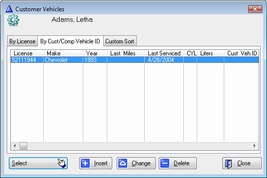
Press Select to select a vehicle, or Click the Insert Button to add a new vehicle for
this customer.
Fill out any other information needed such as Mileage/KM in and when the customer
expects the vehicle to be ready.
Next you will probably want enter some instructions for the Technician
Click on the Notes Tab to enter instructions

You can enter instructions free hand, or Press the F2 Key or Right Mouse to import from a list of previously defined instructions.
Just Highlight a description and click the Select button.

Now Click on the Save Button  to save your new work order. to save your new work order.
This will return you to the Current Work Order Window. Notice your new work order
is now on the browse window.
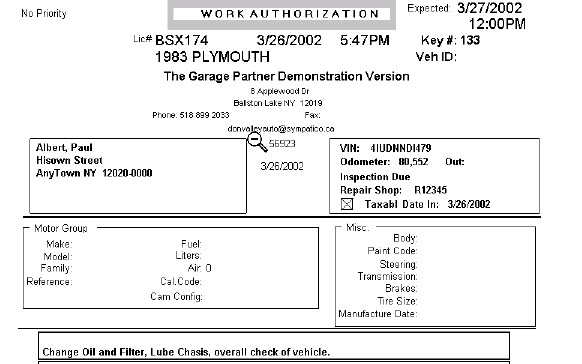
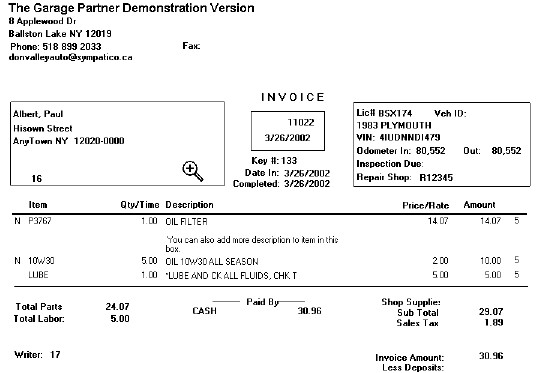
You may want to Print an Authorization form, which also doubles as Work Sheet for the technician.
You can print 2 copies, one for the customer and one for the Tech.
To Print click the  Button. Button.
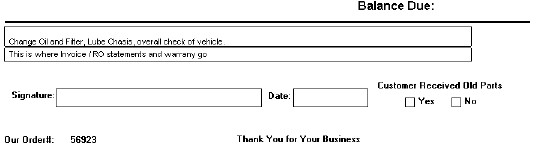
Preview of Authorization Form Printout.

That's all there is to it. You will be adding Parts and Labor detail as the work order is being
completed. This can be done at any time.
To Add Detail Items to the Work Order, Right Mouse Click on the Detail Portion of the Current Order Window, making sure you
have the correct Work Order HiLighted in the Top Window. See Video
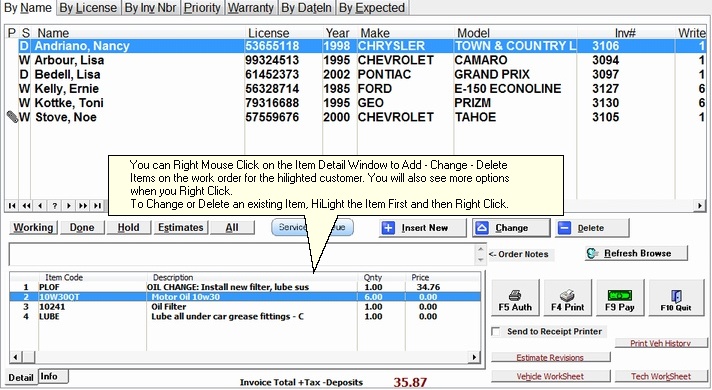 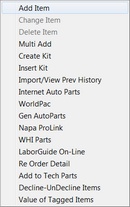
Right Click Menu on Item Detail
Or to add detail, You can Click the Change button  when the work order you want to add when the work order you want to add
detail to is selected(Hi Lited).
Then Click on the Detail Tab
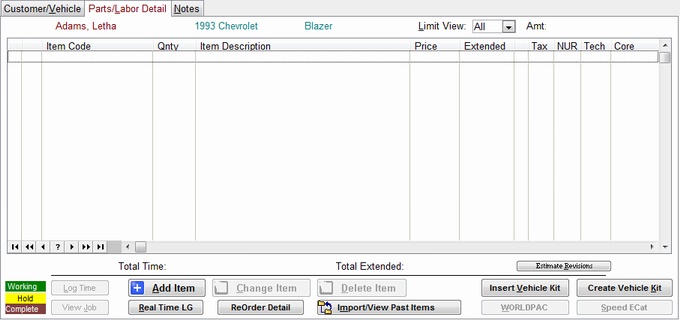
To add detail to work order Click the  Button. This bring up the Add/Change Button. This bring up the Add/Change
Detail Window.
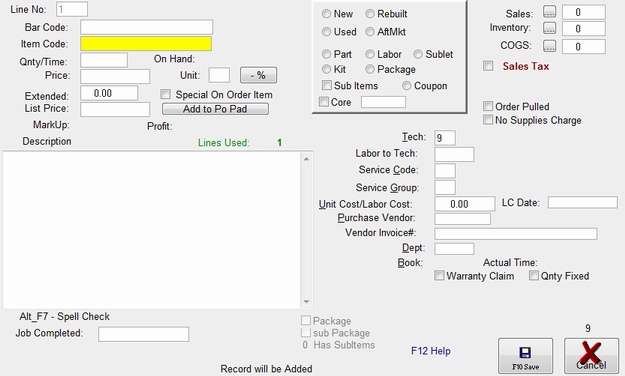
Press the F2 Key to get a list of your Inventory and Labor Items.
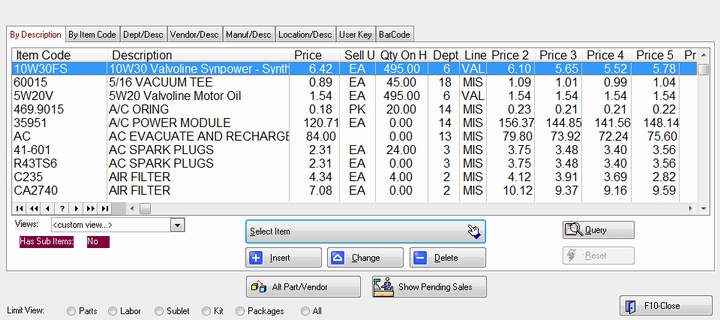
To find a part or labor Item, simply type in the description, the list will find your item
as your type.
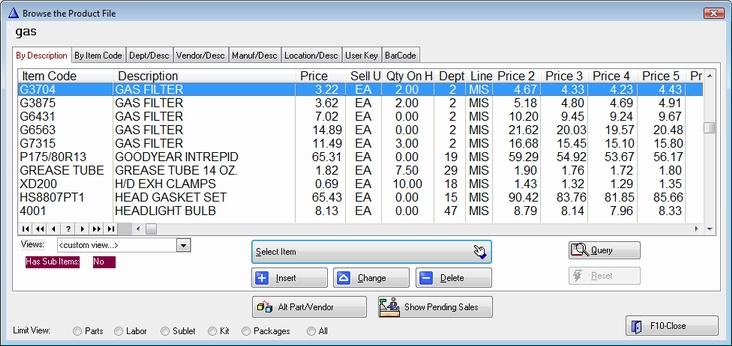
The list can be sorted by any of the TABS at the top of the list, simply
by clicking on the tab.


The list can also be filtered so only Parts - Labor - Sublet or Kits appear
in the list by clicking one of the filter button on the lower left hand corner
of the window.
When the item is found and HiLited, Click the  Button Button
which will automatically enter the item information into work order detail window.
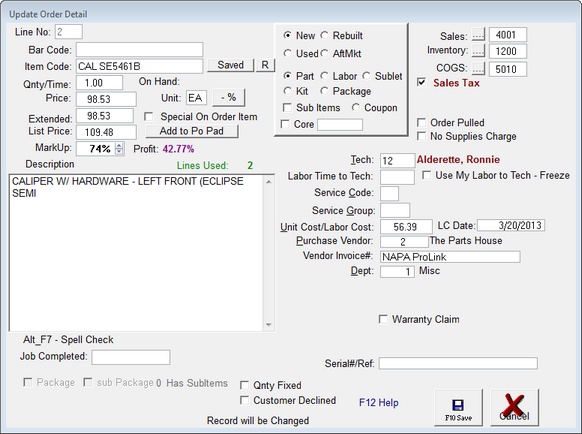
You can add more description to an item, change the quantity, price,
cost etc. from this window. If you are satisfied with the information,
Press the  Button. Button.
Do the same for any other detail items you have sold on this work order.

When you are finished entering Detail, you can Add more Notes by clicking
Notes Tab. Press  Button when you are finished. Button when you are finished.
You may want to Print a copy of the completed work order prior to the customers
arrival. Just click the  Button. Button.
When the customer arrives to pick up his vehicle, HiLite the customer;s work order
and Click the  Button. This brings up the Pay window. Button. This brings up the Pay window.
NOTE
Unless Work Orders are Paid Out and End of Day Processing
is run, Customer, Invoice and Vehicle History will not be available.
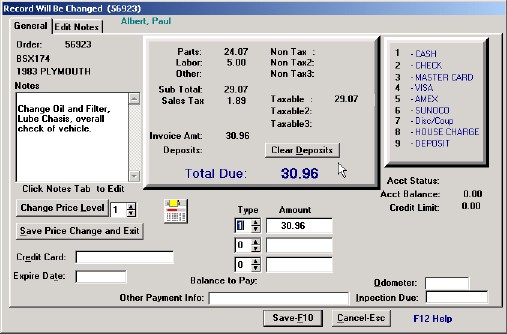
Enter the Pay Type by using the spin box under Type. The payment can split
to 3 different pay types if needed. Click the  Button to consummate the Button to consummate the
sale. You will be asked whether you would like to print and Invoice for the customer.
Normally you would print 2 copies, one for the shop and one for the customer.
That's all there is to Adding,Changing and paying out a Work Order
|