Entering Transactions
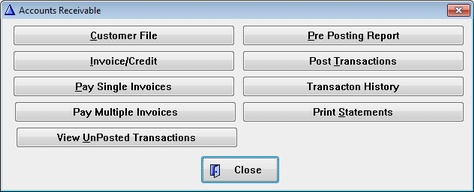
Select Invoice/Credit from the Menu
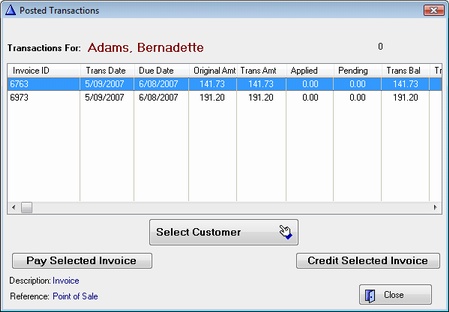
IMPORTANT: Use the Select Customer Button to choose a customer
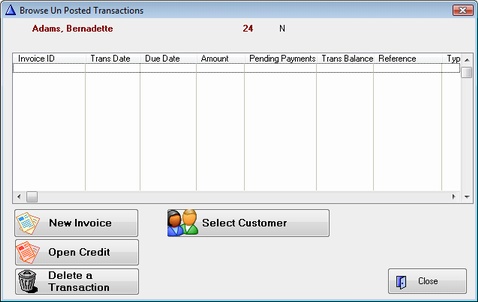
The next screen shows a list of all UnPosted Transactions for the Selected Customer
Any Transaction that has not been posted, can be deleted from this window.
 Use this button to Create a New Invoice Use this button to Create a New Invoice
 Use this button to create an Open Credit. Usually an open credit is used when there Use this button to create an Open Credit. Usually an open credit is used when there
are no existing Invoices to Credit against.
 Use this button to Delete any UnPosted Transactions that may appear Use this button to Delete any UnPosted Transactions that may appear
this Window.
Adding a New Invoice or Credit
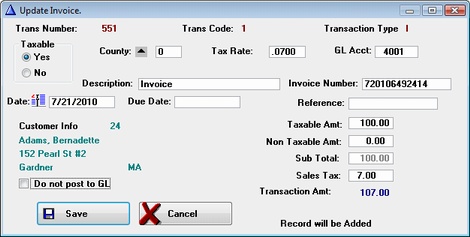
Use the Tab key to move through the fields - Some of the fields will be Pre Filled as you tab into them.
Enter the Taxable amount and or Non taxable amounts. The Sales tax will be calculated automatically.
An Invoice number will be created automatically so that it is Unique.
Click the Save button to record this transaction.
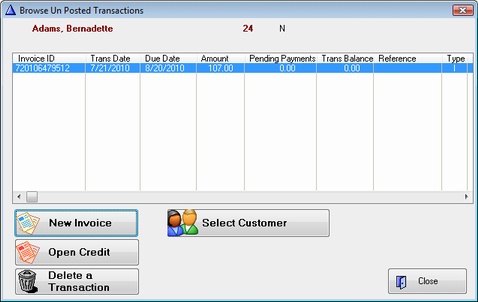
At this point, the UnPosted table shows the invoice you just entered for the selected customer, ready for Posting.
Open Credits can be applied the same way by clicking the Open Credit Button. Open Credits should be used
sparingly, as they will not be applied to the customers account until End of Month is run. Credits can also be
applied to a specific Invoice which will be shown further on down the page. Normally you would enter all
of your transactions, and then perform a posting. For this example, we will post this transaction, and then apply
a credit and a payment to this invoice.
Remember that all AR transaction from Point of Sale are entered automatically for you.
Applying a Payment One Invoice
Select Single Payment from Accounts Receivable Menu. Then
select the customer to apply against.
Tab through the entry fields and enter the amount of payment
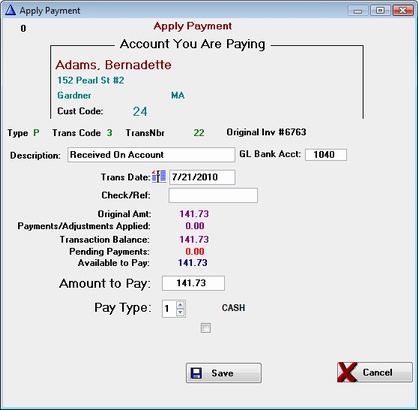
The payment can be partial or full.
Click save to record the transaction.
Click View UnPosted Transaction on the Accounts Receivable Menu
Notice our UnPosted Transactions on the List.
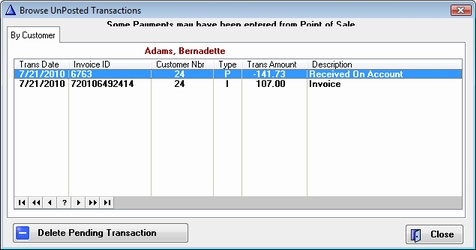
If any of the Transactions are in error, we can Delete the transaction and enter
it again.
Select Print Pre Posting Report. - This report is not for the entries above.
If all is well on this report, Select Post Transactions. This will finalize the two transactions and
update the customer accounts.
|