The Check book allows entry of bills for later payment. The bills can be entered manually or
received purchase orders/Vendor Invoices can be sent over automatically from the Inventory module.
When you post the bill, the General Ledger will be updated.
Manual Entry: Click on the Enter Bills button 
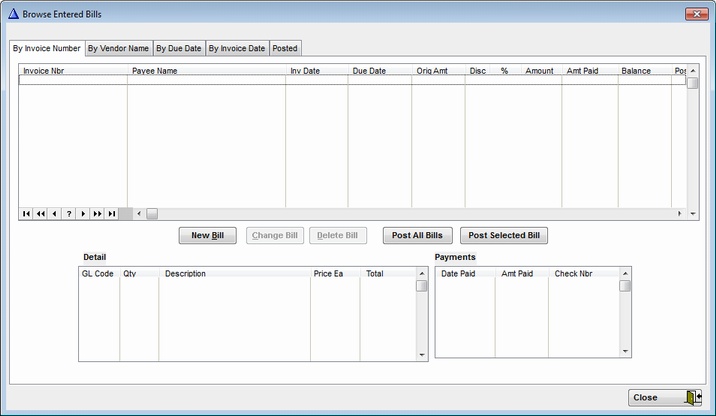
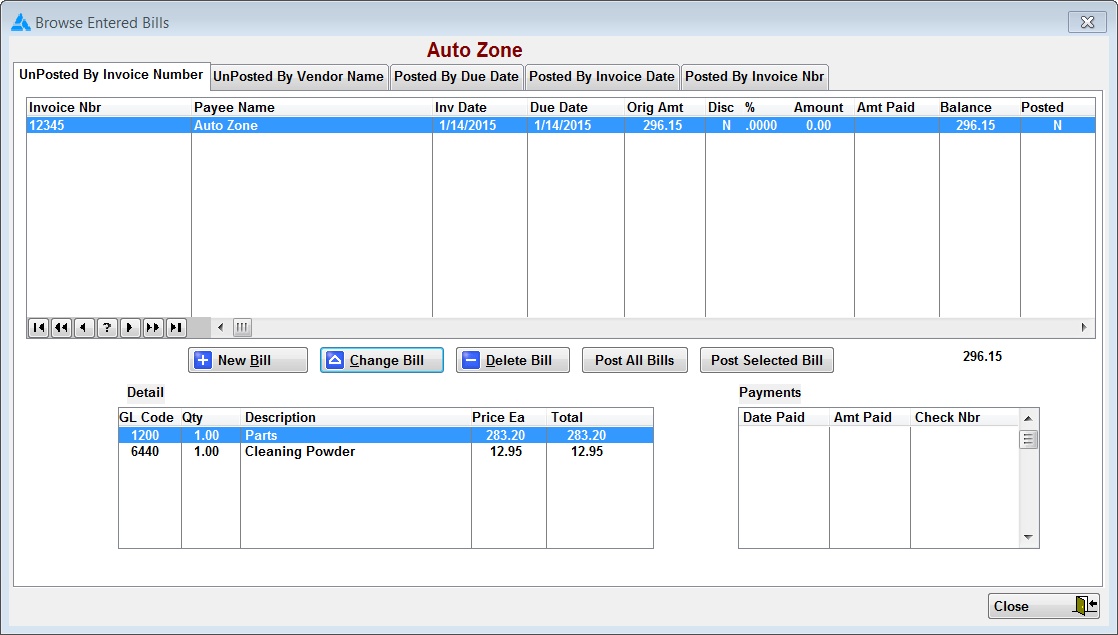
The Browse Bills window opens. This window shows you current bills with the option buttons to Add, Change or Delete an existing Bill. The Change Order Tabs along the top allows viewing Bills by Invoice Number - Vendor Name - Due Date, or Received Purchase Orders that have been sent over from the Inventory Purchasing Module. Simply click the appropriate Tab to change the view.
Adding a New Bill: Click the New Bill Button to add a new bill.
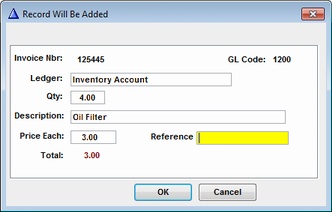
Fill out the appropriate Information
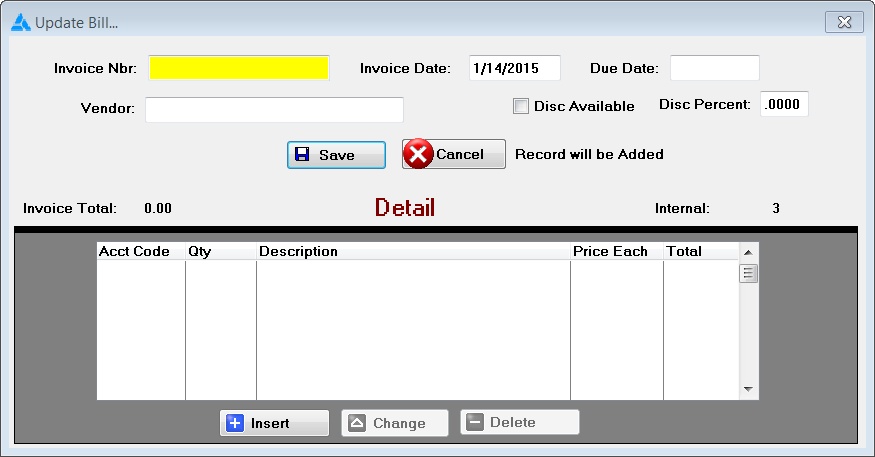
Enter the General Detail for this bill. Click the Insert Button to add the Detail
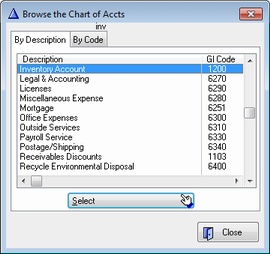
Choose the appropriate Ledger Account from the pop up window and fill in the quantity
and pricing information. The Financial Accounts table appears to select the proper Acct Code.
You can start typing in the description of the Acct Item, or to limit the view to just one of the
limiter button.
Let's say we want to add a part(s) to the bill, you would simply click Current Assets and select the Inventory Account.
If there were Sales tax involved in the purchase, you would add the GL code for Sales Tax and enter in the Amount.
To automatically lookup the financial acct, Click Mouse Right Button when in the Ledger field
If you want to put in each detail, enter the quantity - Desc and Price
Click the OK Button to save the Detail
To Add more items to the bill, Click the Insert Item Button again:
IMPORTANT: All entered Bills must be Posted to the Journal Entry in order to be available for later payment.
To Post only the Selected Bill, Click the Post Selected Bill Button.
To Post all the bills in the list, click the Post All Bills Button.
Be sure to Post the Journal later
Example posting for Parts and Supplies in Bulk - Remember, Inventory Quantities were already updated
when Purchasing/Invoices were posted.
You may also Post all Bill by selecting the Processing Menu at the top of the screen.
Select Processing / Posting > Posting > Post Bills to Ledger Accts. See Posting Interface Accounts
After the Bills are Posted, they will become available to Pay in Banking or to Post
to Ledger Accts. Posting in Financial Tools will update your Financial Accounts.
Posting the Bills to Ledger Accts will also make the Bills available for Import when
paying the bill by Check or from Journal Entry in Financial Tools.
NOTE: If you are entering Invoices received after the fact (Not sent from Purchasing/Invoice Entry,
You bulk enter the amounts, separating only by GL Codes.
|